Blackhawk! Night-Ops Gladius
The Gladius is my favorite flashlight. It's my second-most expensive one (after my LarryK12), and it was worth every penny. It cost me $190 shipped with a Mod-U-Lok holster. I then purchased a Surefire FM34 Beamshaper to give the light a flip-on diffuser, turning this into one of the best and most versatile lights out there.
The Gladius is manufactured under the Night-Ops brand name by the Blackhawk! industry group.
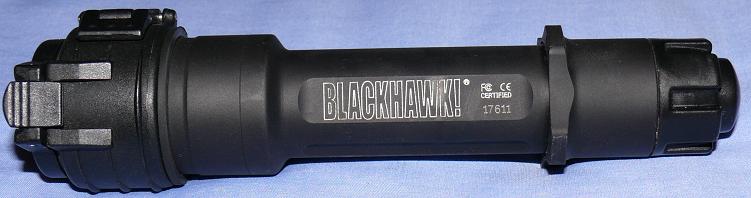
The finish on the Gladius was originally a ceramic finish known as cerakote, but was soon changed to HA on the black models. HA might be available for the other colors at some point as well. This finish is smooth and satiny, and protects the light quite well - of course, EDC can be rough on a light, as shown in the picture below. I keep the side with "Blackhawk!" on it towards me, and the side with "GLADIUS" on it facing outwards. You can see the results.

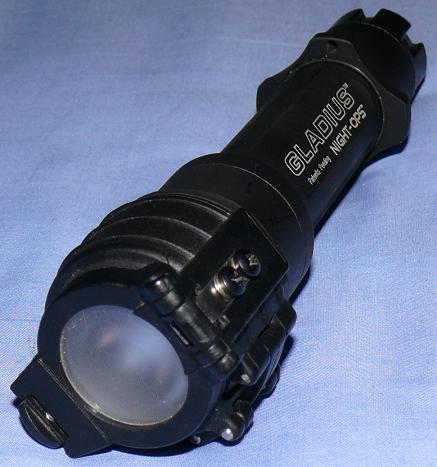
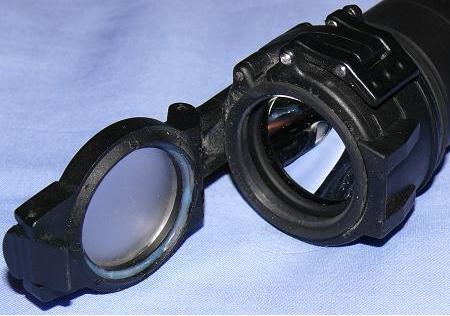
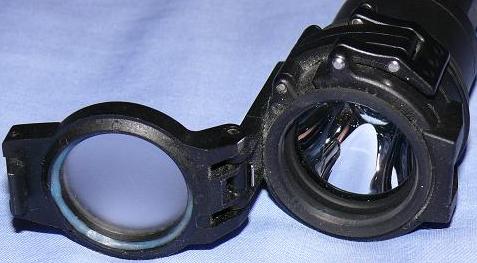
Surefire's FM34 adds some great "tactical bling" (a.k.a. "tacticool") to the light, as well as giving it a whole new level of functionality.
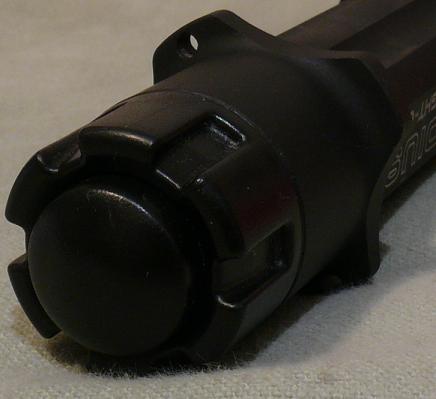
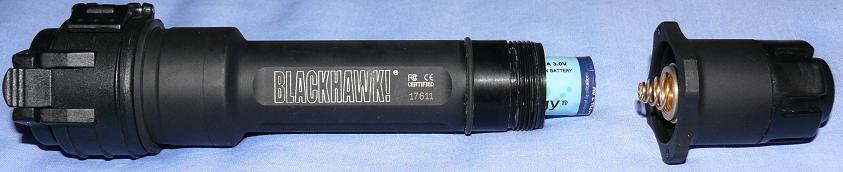
The "magic" of this light, if you will, is in the tailcap. The polymer cap shown below can be rotated through a total of four detented positions, known as "channels." The light is in channel 4 in its most counterclockwise position, and in channel 1 in its most clockwise position.
- Channel 1: This is your basic tactical Momentary. Push for full blast, release for off. It can be activated from either Off or Constant-On.
- Channel 2: This channel will let loose a disorienting Strobe, carefully calculated to to wreak havoc on the eyes and minds of your enemies. Of course, it can also serve other functions, such as a flashing warning to oncoming vehicles, but that's not nearly as tacticool. Push to activate, release to deactivate. It can be activated from either Off or Constant-On.
- Channel 3: This is the channel you'll use most when you want light. Channel 3 contains the light's constant-on and dimming functions. From Off or Constant-On, press and hold the switch to dim the light (the light will activate first if it was Off). The next time you press and hold the switch, it will brighten. If the light is activated into the dimmest possible output, the light will first brighten instead of dim when you hold the switch. If you change the brightness, then change the Channel to 1 or 2 and use the Momentary or Strobe, the Gladius will forget that brightness setting. To keep the brightness setting, set the brightness, then turn the light off. Now you can activate Constant-On and go right into Momentary or Strobe and the Gladius will remember your brightness the next time you activate Constant-On. Channel 3 has three Modes:
- Mode 1: When you push and release the button from Off, the light will switch to Constant-On at its highest intensity.
- Mode 2: When you push and release the button from Off, the light will switch to Constant-On at its lowest intensity.
- Mode 3: When you push and release the button from Off, the light will switch to Constant-On at the level that was active the last time you switched the light from Constant-On to Off.
To switch between Modes, put the light in Channel 3 and press and hold the switch until the light does a double-blink. Press and hold the switch again until the light does a second double-blink. You'll have to hold the switch for about 15 seconds until each double-blink.
- Channel 4: This is the lockout. To use it, switch to Channel 3 and then press the polymer switch partway and rotate it counterclockwise. You will notice that the switch is locked in place. If you want, you can press a little harder before rotating so that the light will lock in Constant-On.
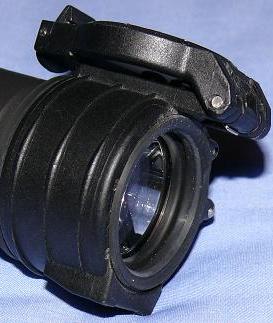
When the FM34 is in place, you'll get a pure, beautiful flood with absolutely zero hotspot. This is perfect for navigation or for using the light near an animal who chases shiny things. To get throw, press the release and flip the diffuser out of the way.

The Gladius's Channels necessitate an addition to the standard battery change procedure. To change the batteries:
- Unscrew the tailcap using the section with the aluminum lugs, not the polymer ring.
- Swap out the batteries (2xCR123A).
- Set the tailcap back onto the light.
- Rotate the polymer ring gently until the whole tailcap drops into place. This is necessary to properly align the tailcap and get the use of Channels.
- Tighten the aluminum portion, using the lugs.
See? That wasn't so hard, was it?
It was? Really? Maybe my little instructional video will help:
I hope that helped.
The Gladius, by default, runs on a pair of primary CR123A cells. However, these are not rechargeable, and if you like this light as much as I do, you'll be using it all the time. Here's the rundown on rechargeables in the Gladius:
- You CAN use a pair of THREE VOLT RCR123A cells. This includes Tenergy cells with a dropping resistor, Powerizer cells with a built-in IC, or LiFePO4 cells (the latter naturally having an open-circuit voltage of about 3.2V). It doesn't really matter how the cells achieve their lower voltage, but they do have to achieve it somehow.
- You CAN use a SINGLE 17670 Li-Ion or 17500 (spacer required) Li-Ion. This is safe for the Gladius, but its lower natural voltage will fool the Gladius into giving you a double-blink low-battery warning (remember, a pair of primaries is 6V while a single Li-Ion is 3.7V) every twenty seconds or so. If you can live with that, great.
- You CANNOT use a PAIR of 3.7V RCR123A Li-Ion cells. This is too much voltage for the Gladius to handle and you run the risk of frying your $190 light.
I dearly love this flashlight. I would even go so far as to say: "OMFG GLADIUS IS TEH R0XX0R ONE!!!!1!!1!1"